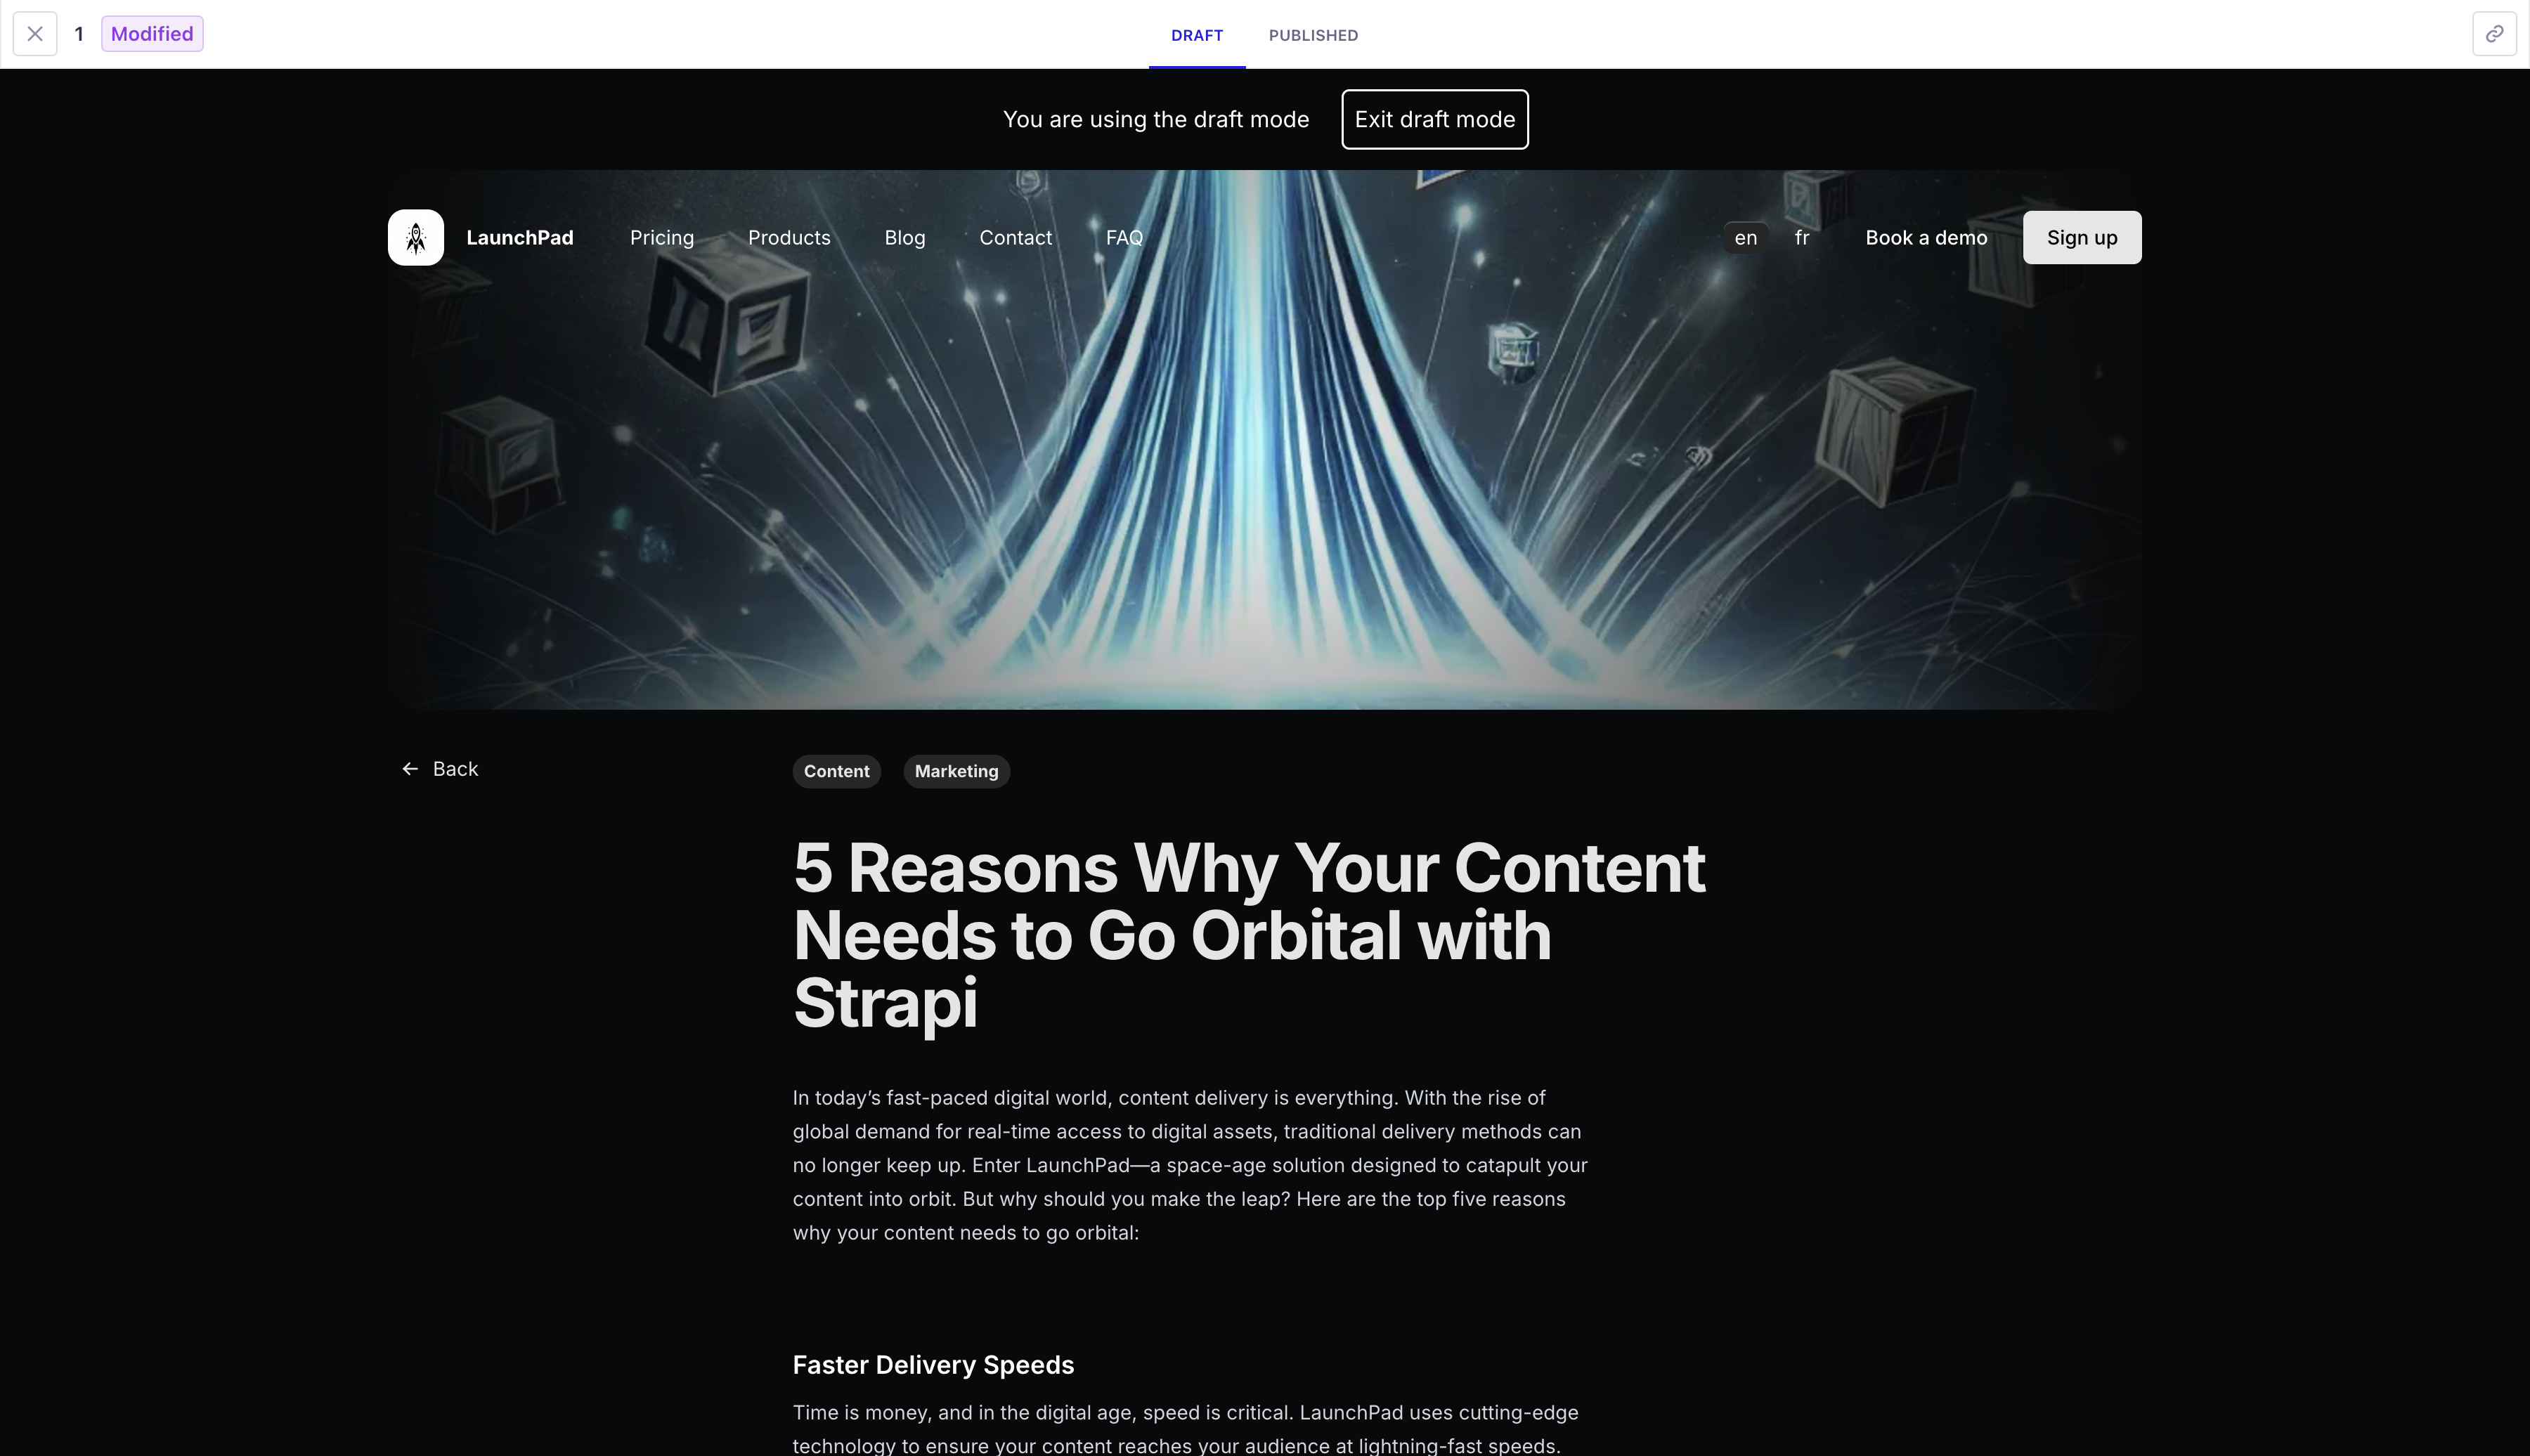
Static Preview Beta
With the Preview feature, you can preview your front end application directly from Strapi's admin panel. This is helpful to see how updates to your content in the Edit View of the Content Manager will affect the final result.


Plan: Free feature.
Role & permission: Read permissions in Roles > Plugins - Users & Permissions.
Activation: Should be configured in the config/admin file.
Environment: Available in both Development & Production environment.
Configuration
-
The following environment variables must be defined in your
.envfile, replacing example values with appropriate values:CLIENT_URL=https://your-frontend-app.com
PREVIEW_SECRET=your-secret-key # optional, required with Next.js draft mode -
A front-end application for your Strapi project should be already created and set up.
Configuration components
The Preview feature configuration is stored in the preview object of the config/admin file and consists of 3 key components:
Activation flag
Enables or disables the preview feature:
// …
preview: {
  enabled: true,
    // …
}
// …
Allowed origins
Controls which domains can access previews:
// …
preview: {
  enabled: true,
  config: {
    allowedOrigins: env("CLIENT_URL"),  // Usually your frontend application URL
    // …
  }
}
// …
Preview handler
Manages the preview logic and URL generation, as in the following basic example where uid is the content-type identifier (e.g., api::article.article or plugin::my-api.my-content-type):
// …
preview: {
  enabled: true,
  config: {
    // …
    async handler(uid, { documentId, locale, status }) {
      const document = await strapi.documents(uid).findOne({ documentId });
      const pathname = getPreviewPathname(uid, { locale, document });

      return `${env('PREVIEW_URL')}${pathname}`
    },
  }
}
// …
An example of URL generation logic in given in the following basic implementation guide.
Previewing draft entries
The strategy for the front end application to query draft or published content is framework-specific. At least 3 strategies exist:
- using a query parameter, having something like
/your-path?preview=true(this is, for instance, how Nuxt works) - redirecting to a dedicated preview route like
/preview?path=your-path(this is, for instance, how Next's draft mode works) - or using a different domain for previews like
preview.mysite.com/your-path.
When Draft & Publish is enabled for your content-type, you can also directly leverage Strapi's status parameter to handle the logic within the Preview handler, using the following generic approach:
async handler(uid, { documentId, locale, status }) {
   const document = await strapi.documents(uid).findOne({ documentId });
   const pathname = getPreviewPathname(uid, { locale, document });
   if (status === 'published')  {
      // return the published version
   }
   // return the draft version
},
A more detailed example using the draft mode of Next.js is given in the basic implementation guide.
Basic implementation guide
Follow these steps to add Preview capabilities to your content types.
1. Create the Preview configuration
Create a new file /config/admin.ts (or update it if it exists) with the following basic structure:
export default ({ env }) => ({
  // Other admin-related configurations go here
  // (see docs.strapi.io/dev-docs/configurations/admin-panel)
  preview: {
    enabled: true,
    config: {
      allowedOrigins: env('CLIENT_URL'),
      async handler (uid, { documentId, locale, status }) => {
        // Handler implementation coming in step 3
      },
    },
  },
});
2. Add URL generation logic
Add the URL generation logic with a getPreviewPathname function. The following example is taken from the Launchpad Strapi demo application:
// Function to generate preview pathname based on content type and document
const getPreviewPathname = (uid, { locale, document }): string => {
  const { slug } = document;

  // Handle different content types with their specific URL patterns
  switch (uid) {
    // Handle pages with predefined routes
    case "api::page.page":
      switch (slug) {
        case "homepage":
          return `/${locale}`; // Localized homepage
        case "pricing":
          return "/pricing"; // Pricing page
        case "contact":
          return "/contact"; // Contact page
        case "faq":
          return "/faq"; // FAQ page
      }
    // Handle product pages
    case "api::product.product": {
      if (!slug) {
        return "/products"; // Products listing page
      }
      return `/products/${slug}`; // Individual product page
    }
    // Handle blog articles
    case "api::article.article": {
      if (!slug) {
        return "/blog"; // Blog listing page
      }
      return `/blog/${slug}`; // Individual article page
    }
  }
  return "/"; // Default fallback route
};

// … main export (see step 3)
3. Add handler logic
Create the complete configuration, expanding the basic configuration created in step 1. with the URL generation logic created in step 2., adding an appropriate handler logic:
const getPreviewPathname = (uid, { locale, document }): string => {
  // … as defined in step 2
};

// Main configuration export
export default ({ env }) => {
  // Get environment variables
  const clientUrl = env("CLIENT_URL"); // Frontend application URL
  const previewSecret = env("PREVIEW_SECRET"); // Secret key for preview authentication

  return {
    // Other admin-related configurations go here
    // (see docs.strapi.io/dev-docs/configurations/admin-panel)
    preview: {
      enabled: true, // Enable preview functionality
      config: {
        allowedOrigins: clientUrl, // Restrict preview access to specific domain
        async handler(uid, { documentId, locale, status }) {
          // Fetch the complete document from Strapi
          const document = await strapi.documents(uid).findOne({ documentId });

          // Generate the preview pathname based on content type and document
          const previewPathname = getPreviewPathname(uid, { locale, document });

          // For published content, return direct URL
          if (status === "published") {
            return `${clientUrl}${previewPathname}`;
          }

          // For draft content, use Next.js draft mode, passing it a secret key
          const urlSearchParams = new URLSearchParams({
            url: previewPathname,
            secret: previewSecret, // Add security token
          });
          return `${clientUrl}/api/preview?${urlSearchParams}`;
        },
      },
    },
  };
};
4. Set up the front-end preview route
Setting up the front-end preview route is highly dependent on the framework used for your front-end application.
For instance, Next.js draft mode and Nuxt preview mode provide additional documentation on how to implement the front-end part in their respective documentations.
If using Next.js, a basic implementation could be like in the following example taken from the Launchpad Strapi demo application:
import { draftMode } from "next/headers";
import { redirect } from "next/navigation";

export async function GET(request: Request) {
  // Parse query string parameters
  const { searchParams } = new URL(request.url);
  const secret = searchParams.get("secret");
  const url = searchParams.get("url");

  // Check the secret and next parameters
  // This secret should only be known to this route handler and the CMS
  if (secret !== process.env.PREVIEW_SECRET) {
    return new Response("Invalid token", { status: 401 });
  }

  // Enable Draft Mode by setting the cookie
  draftMode().enable();

  // Redirect to the path from the fetched post
  redirect(url || "/");
}
Usage
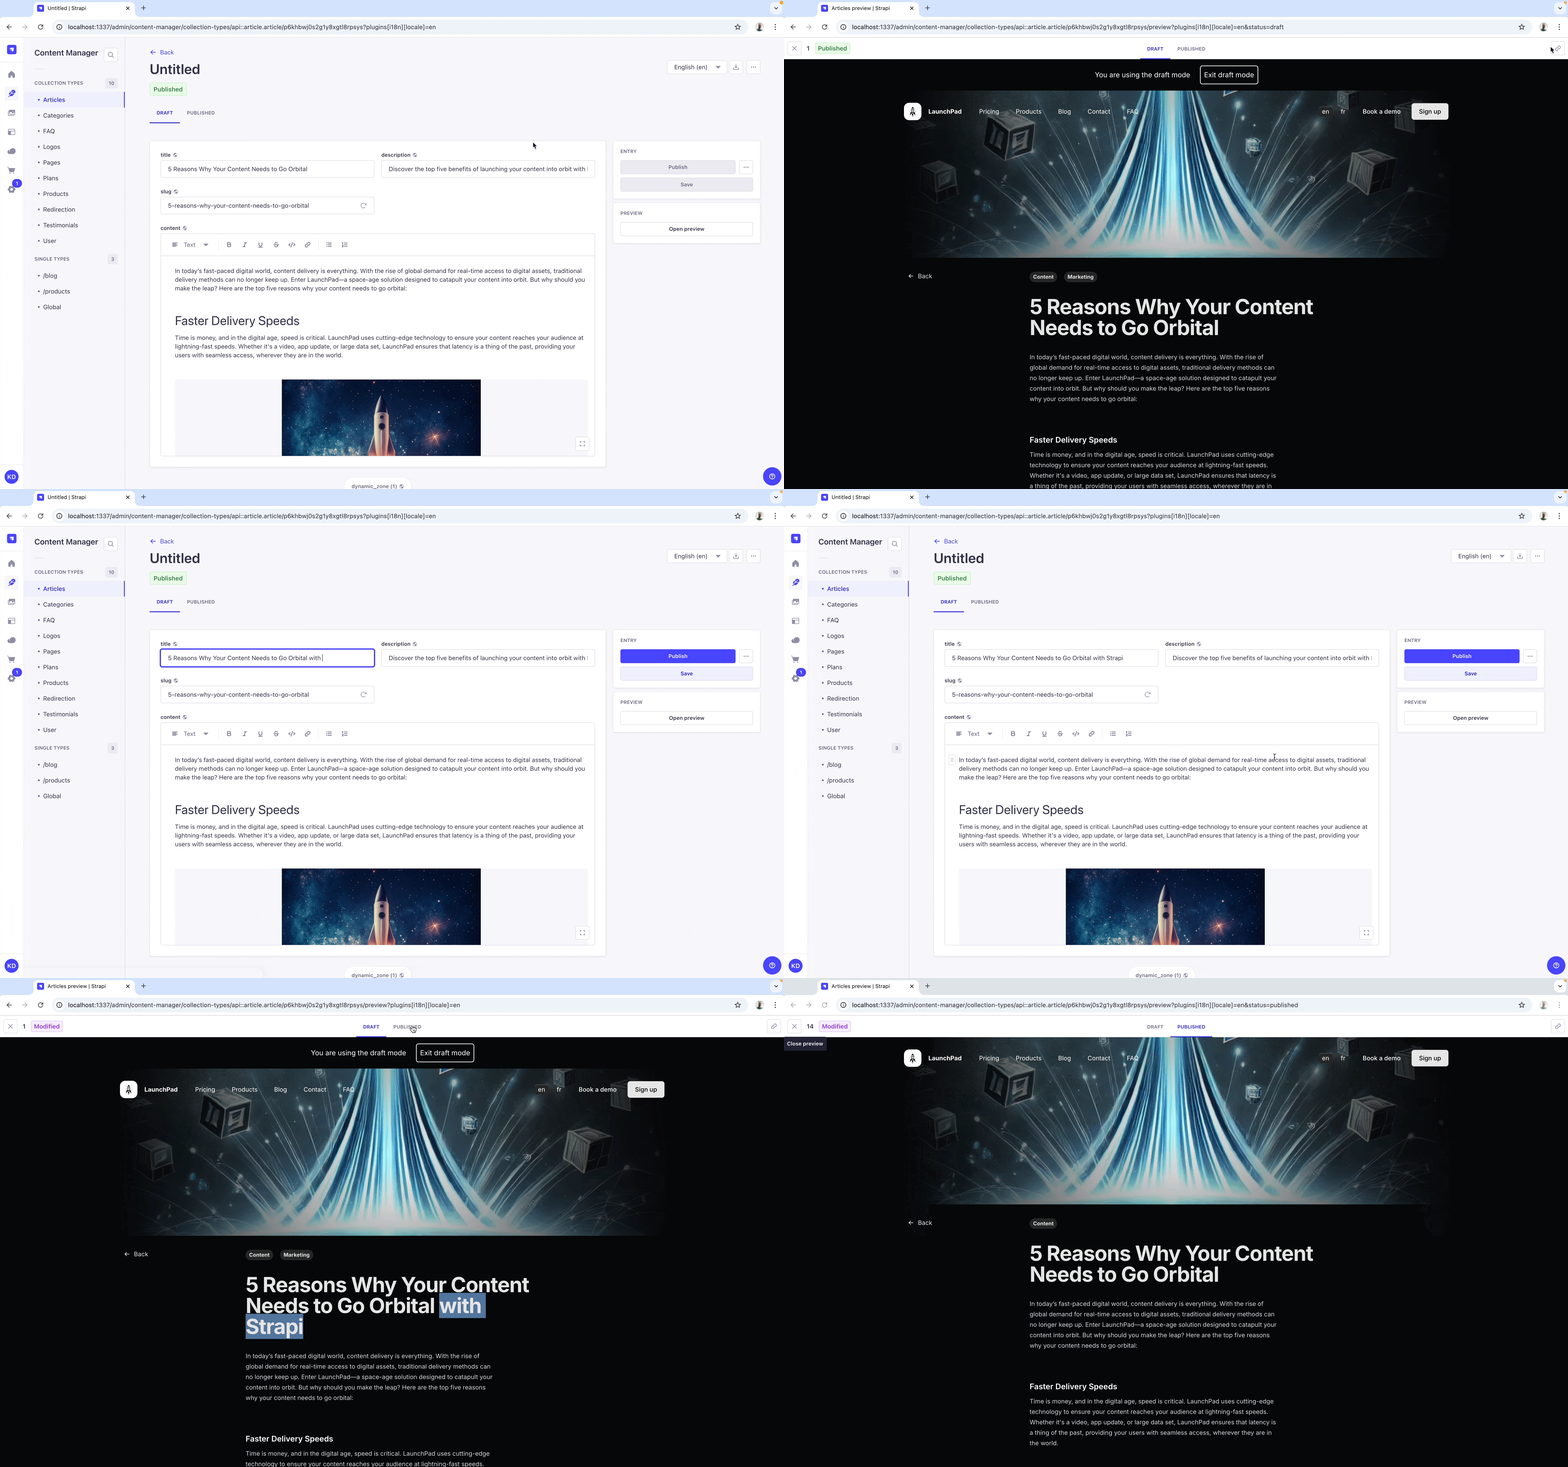
When the Preview feature is properly set up, an Open preview button is visible on the right in the Edit View of the Content Manager. Clicking it will display the preview of your content as it will appear in your front-end application, but directly within Strapi's the admin panel:


From the Preview screen, you can:
- click the close button
in the upper left corner to go back to the Edit View of the Content Manager,
- switch between previewing the draft and the published version (if Draft & Publish is enabled for the content-type),
- and click the link icon
in the upper right corner to copy the preview link. Depending on the preview tab you are currently viewing, this will either copy the link to the preview of the draft or the published version.
When making updates to the content, first save them before clicking on Open Preview again, otherwise your latest updates will be lost. A pop up window will warn you about this behavior.